A scanned crown is not a new type of ceramic; it is a digital way to record, design and manufacture a dental crown. By understanding each appointment step, the limits of scanning, material trade-offs and the alternatives, you can ask better questions about whether this restoration suits your tooth.
Key takeaways
- A scanned crown refers to the digital workflow, not a specific crown material.
- Choose crown material based on tooth location, bite forces, space, and appearance.
- Ask whether a filling or onlay can preserve more healthy tooth structure.
- Check contacts, bite, margins, shade, and cement removal before leaving the clinic.
What a scanned crown actually involves from scan to fitting
“Scanned advanced crown” describes a digital impression and CAD/CAM crown workflow, not a particular material. The dentist examines the tooth, removes decay or weak structure, and prepares enough space for the selected crown while preserving sound tooth tissue.
- The dentist shapes the tooth with rounded internal angles and creates a continuous, readable finish line. A poorly visible margin produces a poorly defined crown edge.
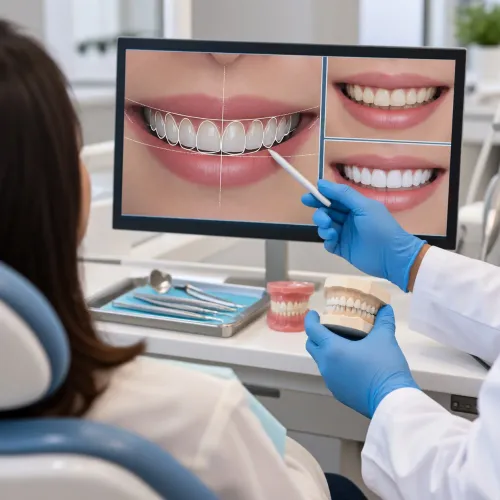
- An intraoral scanner records the prepared tooth, neighbouring teeth, opposing arch and bite. This creates the digital impression.
- The dentist places a temporary crown to protect the tooth while the permanent restoration is designed and made.
- CAD software generates the crown design. You and the clinician can review its shape, contacts and relationship with the opposing teeth before production.
- A milling unit cuts the restoration from a ceramic or zirconia block, or a dental laboratory fabricates it from the scan. Some materials then require sintering or crystallisation.
- The crown is finished, polished, and checked for defects before the try-in.
- At try-in, the dentist checks the margin, contacts, shade and bite, makes necessary adjustments, and completes final cementation.
Same-day treatment depends on having design, milling, sintering or crystallisation, finishing and quality-control equipment available. A scan that takes minutes does not guarantee a finished crown in minutes; fabrication, verification and chairside adjustment still take time.
When digital scanning helps—and where it still has limits
An intraoral scan is not automatically better than a conventional impression. It usually reduces gagging, records a short prepared area quickly, allows selective rescans and sends a digital file to the laboratory without shipping a tray. The advantage is workflow, not guaranteed accuracy.
The scanner captures visible tooth and soft-tissue surfaces. It uses no X-rays and cannot diagnose hidden decay, root infection or bone loss, so clinical examination and radiographs when indicated remain essential. A subgingival crown margin becomes difficult when saliva, bleeding or mobile tissue hides the finish line.
Reflective surfaces, long spans and full-arch stitching add further error.
Check these points before accepting the scan:
- The preparation is dry, blood-free and clearly visible, especially at the margin.
- The digital file shows a continuous finish line rather than gaps or stitched distortion.
- The proposed crown has a clinically acceptable marginal fit and contact points.
- The bite registration agrees with your observed closure, not only the software’s automatic occlusion.
- The laboratory received the correct file and can communicate changes digitally.
- The crown will be checked and adjusted chairside after insertion.
These checks address digital dental impression limitations. A scan can record geometry precisely yet still produce the wrong result if tissue moves, the margin is hidden or the patient’s bite shifts during registration. Ask for chairside adjustment when contacts or bite feel high; convenience does not replace verification.
How crown materials change the design and treatment trade-offs
A scan captures the tooth and bite; it does not choose the crown material. The decision depends on tooth position, available space, bite forces, shade demands and remaining tooth structure.
| Material | Strength and chipping risk | Translucency and bonding | Tooth-reduction trade-off |
|---|---|---|---|
| Monolithic zirconia | High fracture resistance; low porcelain-chipping risk because it is one piece | Less lifelike than glass ceramic; usually needs specialized surface treatment and cement | Can work with relatively conservative clearance, but the design still needs adequate thickness |
| More translucent zirconia | More appearance-focused; strength varies by product and is not automatically equivalent to monolithic zirconia | Better light transmission; bonding and cement choice remain product-specific | Requires enough space for the selected grade and its strength requirements |
| Lithium disilicate | Strong esthetics; fracture risk rises when thickness, support or bite forces are unsuitable | High translucency; commonly bonded after manufacturer-directed hydrofluoric-acid etching and silane | Needs sufficient ceramic thickness, which can require more reduction |
| Porcelain-fused-to-metal crown | Strong metal substructure; veneering porcelain can chip | Good shade potential; bonding depends on the metal and cement system | Needs room for both metal and porcelain |
| Metal | Excellent load tolerance and low chipping risk | Opaque or metallic appearance; cement retention is material-specific | Often permits conservative reduction, but clearance and resistance remain necessary |
This metal dental crown material comparison shows why “strong” and “metal-free” are marketing shortcuts, not prescriptions. A zirconia crown suits neither every front tooth nor every thin preparation, while a lithium disilicate crown is not automatically suitable for heavy grinding.
Preparation still requires rounded internal angles, a continuous readable finish line, adequate clearance and sufficient retention or resistance. The crown design must match the material and the bite.
How to decide between a crown and a less extensive restoration
A direct filling preserves more tooth than a crown, so ask “when is a dental crown needed?” when decay, a large filling, significant cracks, root-canal treatment or weakened cusps leave the tooth unable to withstand substantial bite forces.
A scan changes how the crown is designed and made; it does not, by itself, justify covering the tooth.
| Option | What it means | When it applies |
|---|---|---|
| Direct filling | Composite placed directly in the cavity | Small to moderate decay with strong remaining walls |
| Inlay | Laboratory-made restoration inside the cusps | A contained defect that needs more precision than a filling |
| Onlay | Covers one or more weakened cusps | A sounder tooth with damaged cusps; often preferable in a crown versus onlay decision |
| Veneer | Thin facing on the visible front surface | Limited cosmetic change with adequate enamel, not major structural loss |
| Crown | Covers the entire prepared tooth | Extensive damage requiring cuspal and bite-force protection |
| Bridge | Fixed replacement supported by neighbouring teeth | A missing tooth when suitable adjacent abutments exist |
| Implant-supported crown | Crown attached to an implant | A missing tooth with adequate implant support, rather than a restorable natural tooth |
A conventional laboratory crown and a scanned crown can use the same materials; the difference is the impression and design workflow. Crown alternatives include monitoring when a limited lesion is stable and the dentist confirms that delaying restoration is safe.
Pause before preparation if active decay, uncontrolled gum disease, inadequate ferrule, severe bruxism or an unrestorable tooth is present. Dr. Panjiars Dental Clinic can use examination, bite assessment and imaging—not the scan alone—to weigh that choice.
What must be checked before cementation and after the crown is placed
Digital production does not guarantee a perfect fit or permanent result. Before crown fitting and cementation, trial-fit the restoration and check each clinical detail rather than trusting the design file.
- Inspect the margins directly for gaps, overhangs or rocking. Take a radiograph when the margin, contact or remaining tooth cannot be assessed clinically.
- Floss each proximal contact. It should resist gently without shredding floss or leaving an open food trap.
- Perform crown shade matching under suitable lighting before cementation; saliva, dehydration and temporary-crown materials can mislead the comparison.
- Check the bite in normal closure and during movements. Automatic occlusion software is a design aid, not proof of the patient’s true bite.
- Make the crown bite adjustment conservatively, then polish adjusted ceramic surfaces as directed.
Cementation remains material-specific. Lithium disilicate commonly uses manufacturer-directed hydrofluoric-acid etching followed by silane; zirconia is not etched with hydrofluoric acid and needs a different surface-treatment and cement strategy. Follow the restoration and cement manufacturers’ instructions.
After placement, monitor sensitivity, gum irritation, looseness, food trapping and chewing discomfort. Dental crown longevity can be reduced by fracture, loss of retention, recurrent decay, endodontic disease, gum problems, wear or chipping. The modern advantage is workflow control: faster data transfer, clearer laboratory communication and selective rescanning—not guaranteed biological health or unlimited durability.
Frequently asked questions
What does a scanned crown appointment involve?
The dentist examines and prepares the tooth, captures a digital impression with an intraoral scanner, designs the crown using CAD software, and fits the manufactured crown after checking its contacts, margins, bite, and appearance.
What are the limits of digital dental scanning?
Scanning can improve comfort and provide a detailed digital impression, but saliva, blood, a limited opening, deep margins, movement, or missing scan data can reduce accuracy. The dentist may need to rescan or use another impression method.
How do crown materials affect treatment decisions?
Ceramic, zirconia, metal, and porcelain-fused-to-metal crowns differ in strength, thickness, appearance, wear, repairability, and suitability for the tooth’s location and bite forces.
When is a crown less suitable than a filling or onlay?
A filling or onlay is worth considering when enough strong tooth structure remains and the damage does not require full cuspal coverage. A crown removes more tooth structure and is not automatically the best option.
What should be checked before and after crown cementation?
Before cementation, check the crown’s fit, margins, contacts, bite, shade, and internal surface. After placement, remove excess cement, recheck the bite, and report persistent sensitivity, pain on biting, looseness, or a rough edge.